PKTMON is a built-in command-line network capture tool in Windows. It requires no installation of any third-party application nor adding new Microsoft software roles or features. It is available on Windows Server 2019 and 2022, as well as in Windows 10 and Windows 11.
Regardless if we want to review the network packets live on the console screen, or store them in a PCAP file for offline analysis, we need to define at least one “filter.”
The filter is a set of rules describing what content we wish to collect.
Without any filter defined, any packet capture will inevitably become overwhelmed by an endless stream of arbitrary data.
Open an elevated Command Prompt or Powershell window.
Begin by verifying the current state of filters on your system:
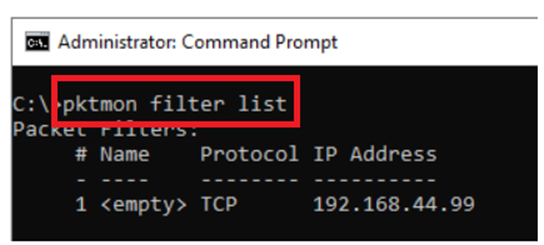
pktmon filter listThe current filters could be cleared using the command:
pktmon filter removeNote that this command will always remove all filters. You can not remove individual filters from the list.
Important facts about PKTMON filters:
- There is one active filter ruleset per server. Note that the filter set is not per administrator. The server shares one current filter set, meaning if two administrators are logged on to the same server simultaneously, they will see and work with the same filter ruleset.
- The filter ruleset will persist between administrator logoff and login.
- The filter ruleset will not be persistent after a server reboot.
Filters could be applied at network layers 2, 3, and 4.
LAYER THREE:
First, we will investigate the layer 3 options, often the most commonly used filters.
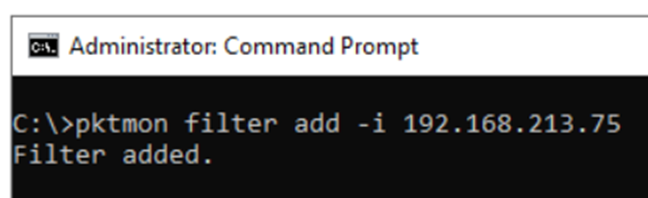
pktmon filter add -i 192.168.213.75This command will, as expected, add one individual IP address as a filter. It is not possible to differentiate between source or target IP in the filters.
To add a network range, use the ordinary CIDR notation to specify the network name and size of the range:
pktmon filter add -i 192.168.214.0/24Note that you cannot enter an FQDN as a replacement for an IP address.
After adding the addresses, verify with the command “pktmon filter list” that the filters are in place:

LAYER FOUR:
With the option -t, we describe the transport protocol. Available keywords are: TCP, UDP, ICMP, and ICMPv6.
(Here, we do not need to worry about if ICMP should be considered a transport protocol/layer four protocol or not.)
pktmon filter add -t TCPpktmon filter add -t ICMPAdditionally, for UDP and TCP, we can select the port to be captured. Option -p designates the port number for UDP or TCP.
pktmon filter add -p 445pktmon filter add -p 53Note, we cannot add ranges of ports. Neither can “negative” filters be added, like “NOT UDP”.
A crucial topic to understand is how PTKMON interprets the filter ruleset. Assume we have added three components to the ruleset and now verifies the current settings:
pktmon filter list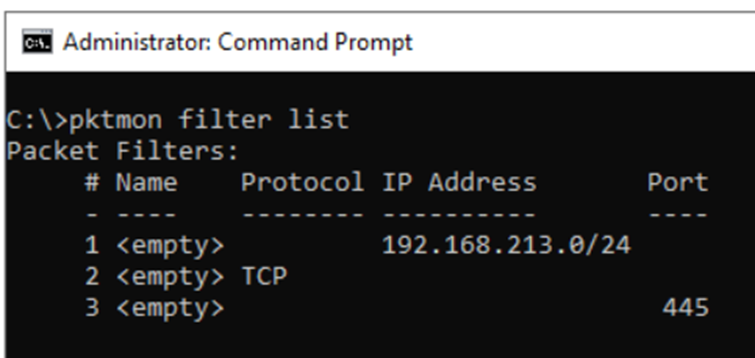
Here, we might assume we will filter for traffic from the network 192.168.213.0/24 using TCP/445.
However, this is not what the current ruleset will accomplish. Instead, we will get a hit for every packet carrying a TCP header, regardless of the port number.
These excessive hits are due to how the ruleset logic is applied.
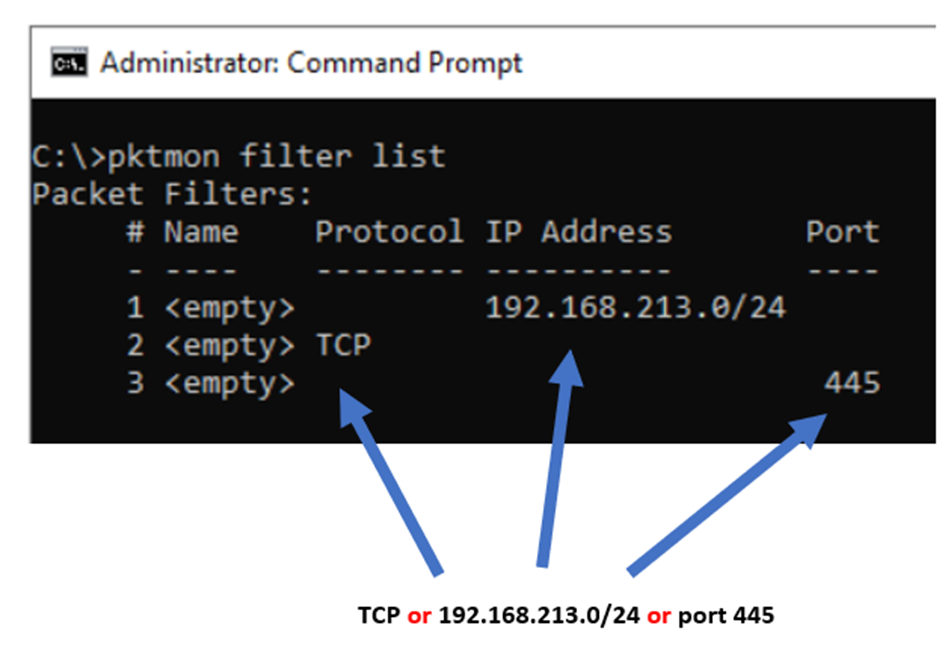
If we have multiple rules, the individual filter lines will be treated as “OR” statements. The filter set above will be interpreted as: capture any packet that is either from the network range of 192.168.213.0/24, or has a TCP header, or has the port number of 445.
For the individual components to be treated as “AND” statements, they need to be entered on the same filter line.
Clear the current ruleset by:
pktmon filter removeNow, add the three statements together:
pktmon filter add -i 192.168.213.0/24 -t TCP -p 445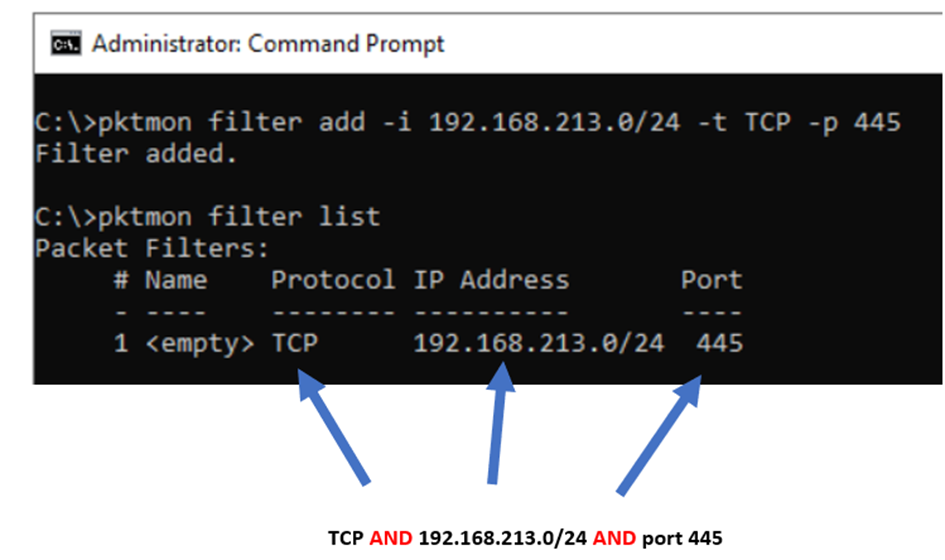
Note, you can still enter multiple lines. These lines will be treated as “OR” statements.
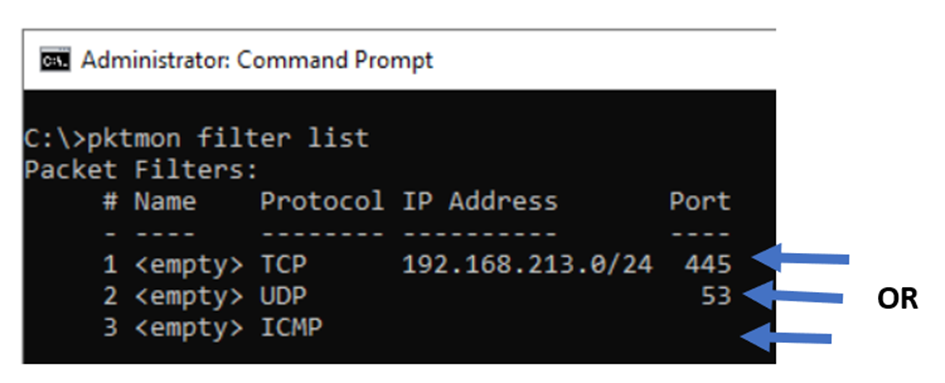
The ruleset above will capture traffic that is either from network 192.168.213.0/24 with TCP/445, or traffic using UDP/53, or is an ICMP packet.
To further improve the insight into TCP traffic, we could also include various TCP flags in our filter.
For example:
pktmon filter add -i 192.168.213.75 -p 445 -t TCP SYN RST FIN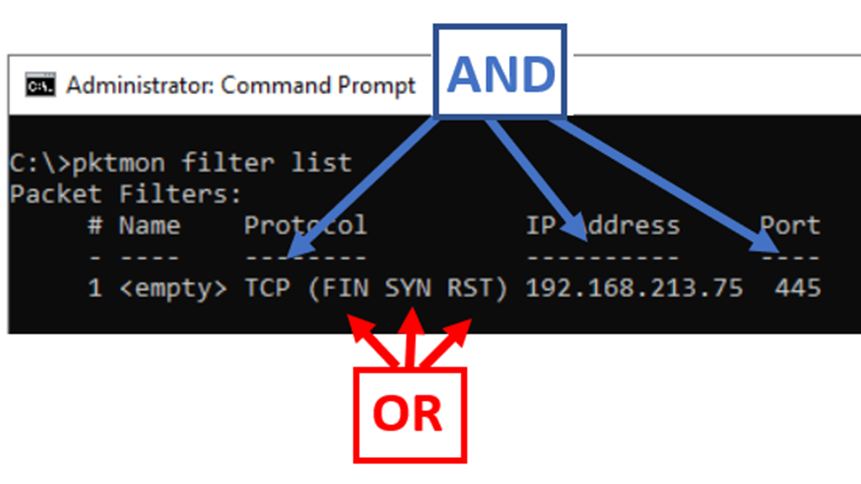
This filter will mean the following: packets will be captured if the IP address is 192.168.213.75 and is using TCP/445, and the TCP flags contain at least one of the specified flags FIN, SYN, or RST.
Note, the flags will not need to be present all at once. (For example, the combination of flags in this particular example will never occur at once.)
For the transport layer syntax, only these protocols are available as keywords: TCP, UDP, ICMP, and ICMPv6. However, you might want to capture some additional protocols, such as IGMP or GRE.
Such protocols could be added by specifying the “IP Protocol Number” of the desired protocols. For example:
pktmon filter add -t 50This command will add a filter for the IPSEC ESP header, using protocol number 50.
Some examples of protocols and their numbers are:
2 IGMP
4 IP-in-IP
47 GRE
50 ESP
89 OSPF
112 VRRP
Note, when using the “pktmon filter list” command, the protocol numbers will be displayed in hexadecimal format.
LAYER TWO FILTERS:
Finally, for layer two, we have three different options to filter for. We could define a MAC address that must be present as either source or destination. This is defined by the parameter -m.
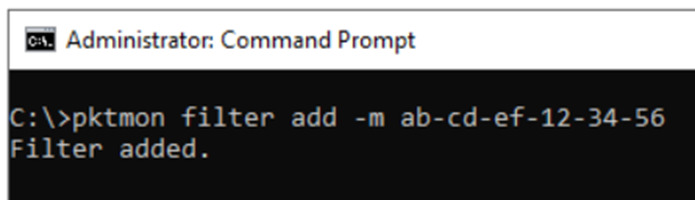
pktmon filter add -m AB-CD-EF-01-23-45Note, in different operating systems and network equipment, MAC addresses could be displayed in slightly different formats, e.g., in groups of two hexadecimal values, separated with either the minus or the colon symbol, or in groups of four. The PKTMON accepts only the paired format, separated with a minus or a colon symbol. You must enter the MAC address in these particular formats: xx-xx-xx-xx-xx-xx or xx:xx:xx:xx:xx:xx.
Possible use cases could be to specify a MAC address for a particular server in the same network segment, or to capture packets known to originate from certain well-known sources. Such source could, for example, be:
pktmon filter add -m 01-00-0C-CC-CC-CCThis address will be the sending source of Cisco CDP packets and could be useful to locate the physical switch port location of a physical server.
Another layer two option is to apply a filter for the Ethertype value. (Please see this article for additional information about the Ethertype field.)
In PKTMON, the Ethertype could be selected by the -d parameter. Common Ethertype values are: ARP, IPv4, and IPv6. These protocols are carried directly upon Ethernet.
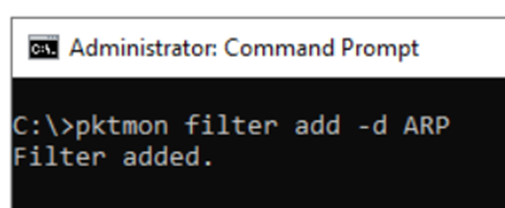
pktmon filter add -d ARPThis option will instruct the PKTMON to include ARP frames in the list of captured packets.
Besides ARP, IPv4, and IPv6, the following keywords are supported:
LLDP, 802.1X, VLAN
For any additional Ethertype desired to capture, add the corresponding hexadecimal Ethertype value with the -d option:
pktmon filter add -d 0x8808This example will add a filter for Ethernet Flow Control protocol, using Ethertype value 0x8808.
Examples of Ethertype values:
0842 Wake-on-Lan
8906 Fibre Channel Over Ethernet
88A8 Q-in-Q VLAN
8035 RARP
8809 LACP
8808 Flow Control
Another layer-two option is to filter for 802.1Q VLAN tags. This is set by the -v parameter.
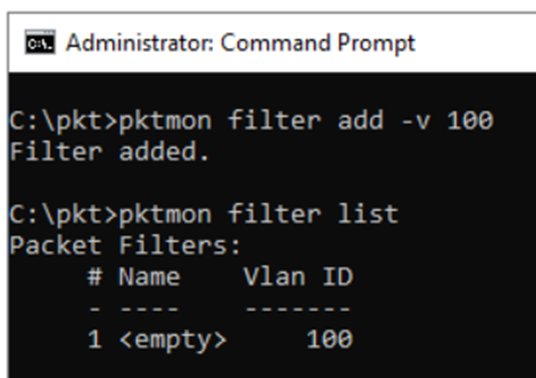
pktmon filter add -v VLAN-IDNote that frames are typically untagged by either the physical switch or the hypervisor before they reach the operating system. However, if you are in a situation where you expect tagged frames to arrive, you could use the -v parameter to capture the data.
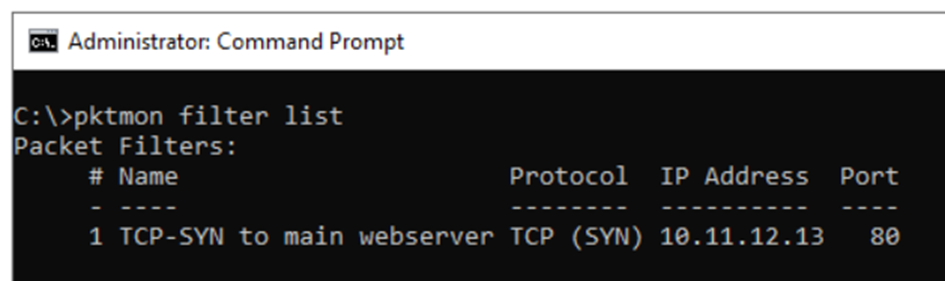
For all filters added, we could also include a description/name of the filter. This option is just for the convenience of the administrator.
pktmon filter add "DESCRIPTION" -i 192.168.100.50For example:

The description will be seen in the filter list:
This ability could be useful, for example, by storing a number of the most commonly used filters in a Notepad document:
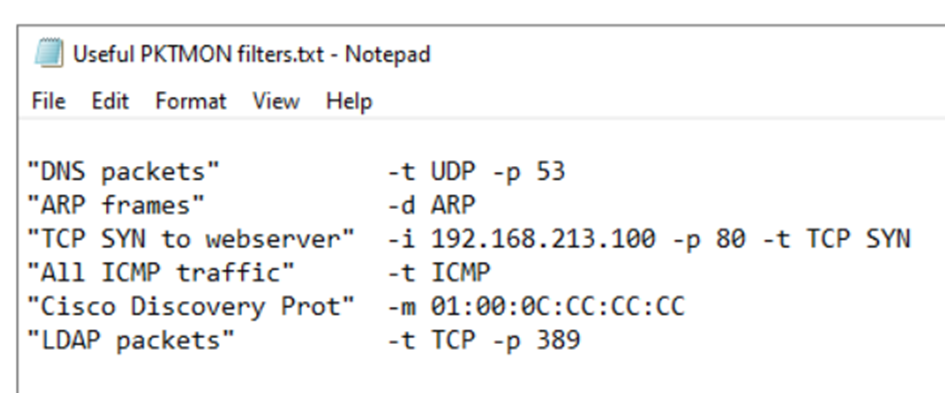
The administrator could now just copy the desired line after the usual pktmon filter add.
To run PKTMON directly on the command line, please read the next article: